Heidi came to visit us at the beach to get away from the blazing heat of Missoula, MT! Lucky us! We got to have her lovely company for several days, and she brought huckleberries. I know I have expressed my infatuation with huckleberries here already, but without fail their fragrance makes me ecstatic. Part of the excitement is that they are truly a seasonal fruit—one that you can find only in the summer, and only in specific parts of the country. They aren’t grown commercially, must be handpicked, and we have to share them with Grizzly bears—what could be more exciting than that?
The berries that Heidi brought this time were so sweet we ate the first few raw, popping them one after another into our mouths. Though it seems nearly impossible to improve their flavor, huckleberries are transformed when warmed up with a taste of sugar and a pinch of cinnamon, and when cozied up next to something creamy. Cheesecake is the perfect accompaniment!
I have made this cheesecake so many times I’ve lost track of where it came from originally, and have made some small changes over the years. It is a recipe that begs to take on the personality of its maker. While cheesecake is easy to make, you can’t hurry it. It is not a dessert that you whip up to bring to a picnic later that afternoon. It has to cool completely, and in stages. I learned that the hard way when, years ago, I brought a still cooling cheesecake to a BBQ and had to serve it in bowls (embarrassing, but still good—in a soupy kind of way). From start to finish you have to take your time. Adding the ingredients in the right order, beating the mixture until it is smooth, baking the cake slowly, letting it gently cool in the oven with the door ajar, cooling it on the counter, chilling it overnight–these steps are all essential to making the creamiest, dreamiest cake imaginable. The good thing is that most of the time it takes to make this cake is passive. While the cake is baking/cooling you can take a nap, read a book, do a hundred sit-ups, write a letter, plant some vegetables, do the dishes, and/or call your mother.
There are many ways to make this cheesecake year round. You can easily substitute any other berry for the huckleberries, or serve it with roasted fruits such as peaches, apricots, figs, or cherries. Substitute gingersnap or chocolate wafer cookie crumbs for the graham cracker crumbs, and add spices, coconut, citrus zest, finely chopped nuts, candied ginger, or cocoa nibs to make the crust your own.
 Mix the cream cheese, sugar, salt, vanilla extract and lemon zest together until smooth.
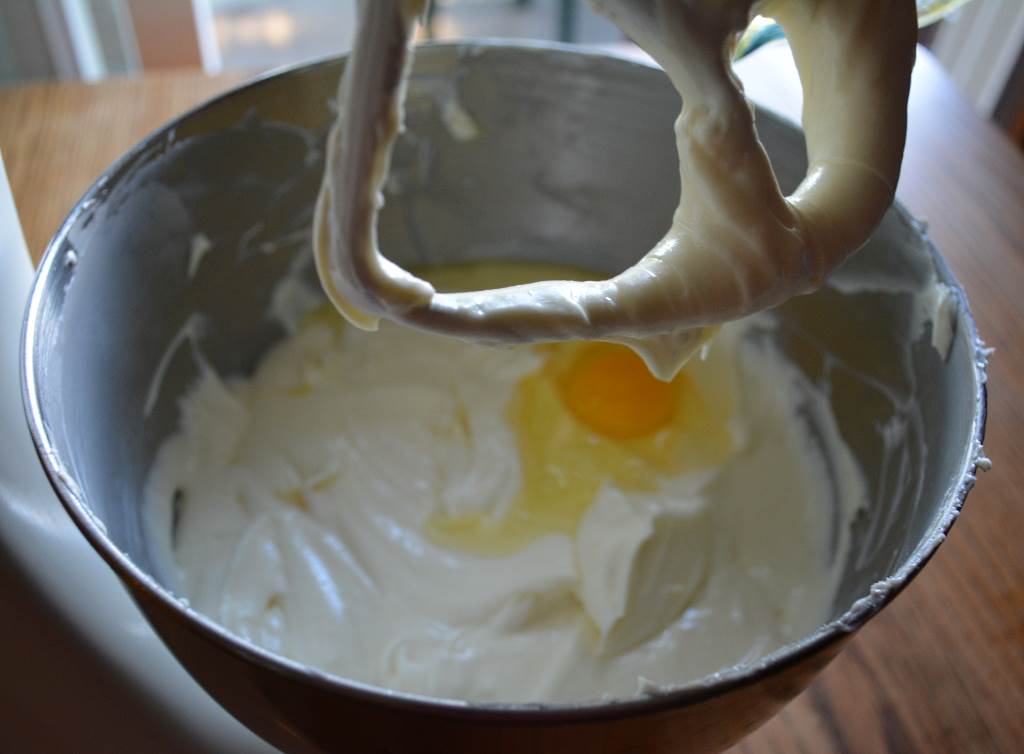 Add the eggs, one at a time, and beat until smooth after each addition.
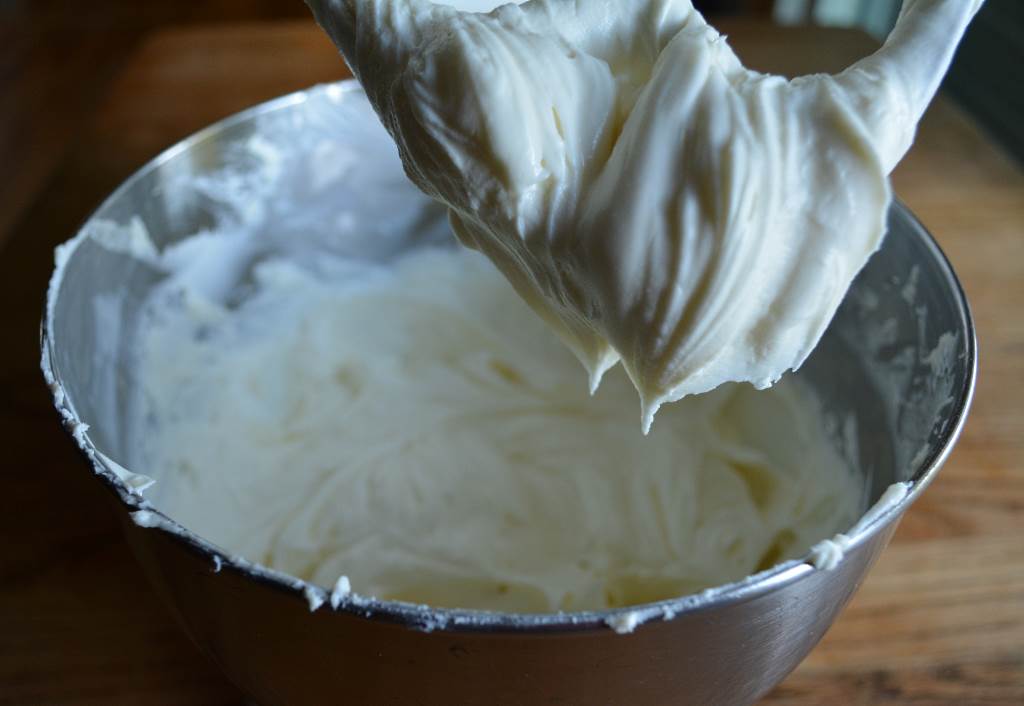
 The batter will be satiny smooth when mixed completely.
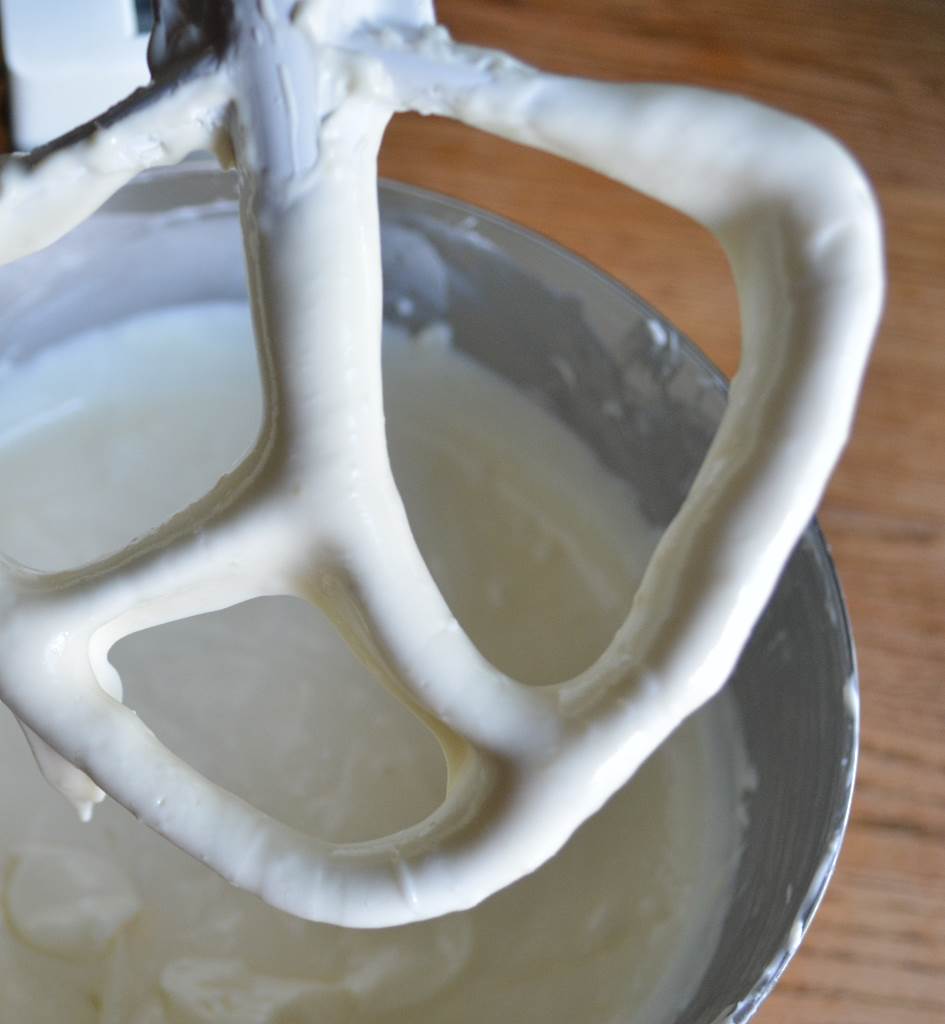
 There will be a few air bubbles in the batter. That’s what makes it light and creamy.
 My ancient springform pan finally gave out and I bought a new “push pan” for this post. The new pan has no spring attachment, which is great because it won’t break, but though it claims to be leak-proof, it was not. It may have been a case of user error? I almost cried when the crust was a bit soggy in places, but miraculously the moist bits disappeared. Next time, and for sure if using a springform pan, I’ll wrap the bottom and sides (about half way up) with a double layer of aluminum foil.
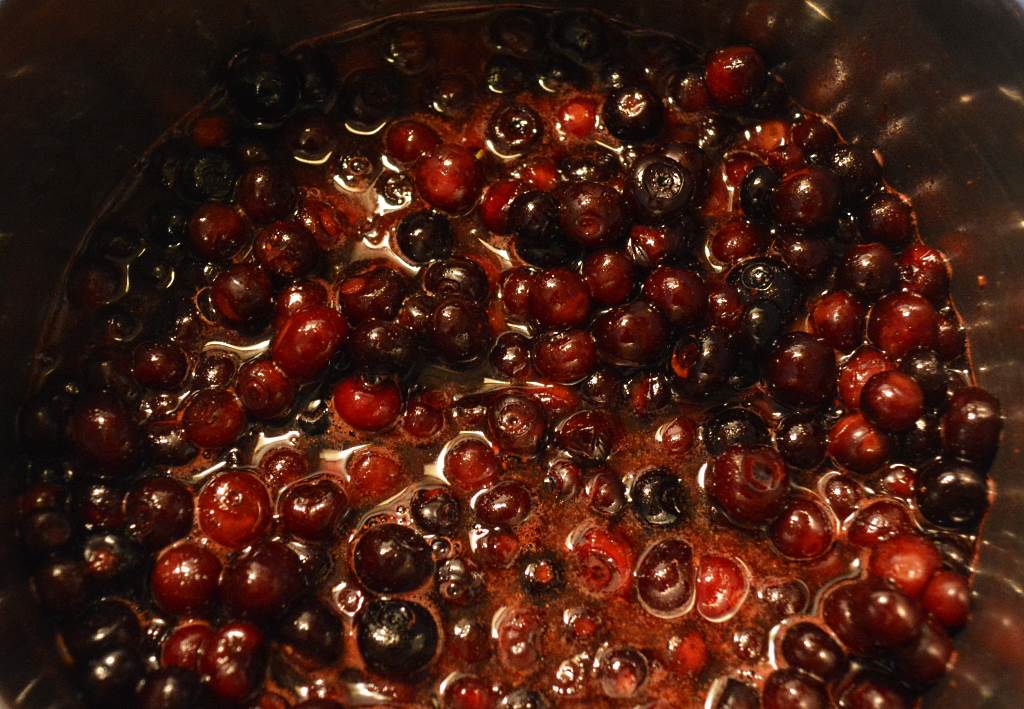 Huckleberry topping burbling on top of the stove.
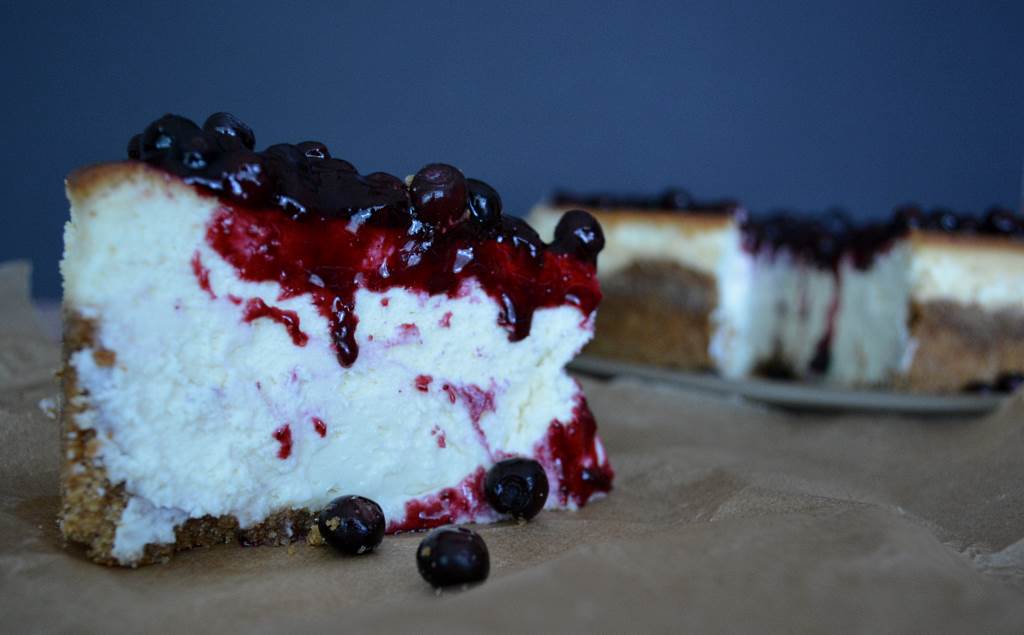
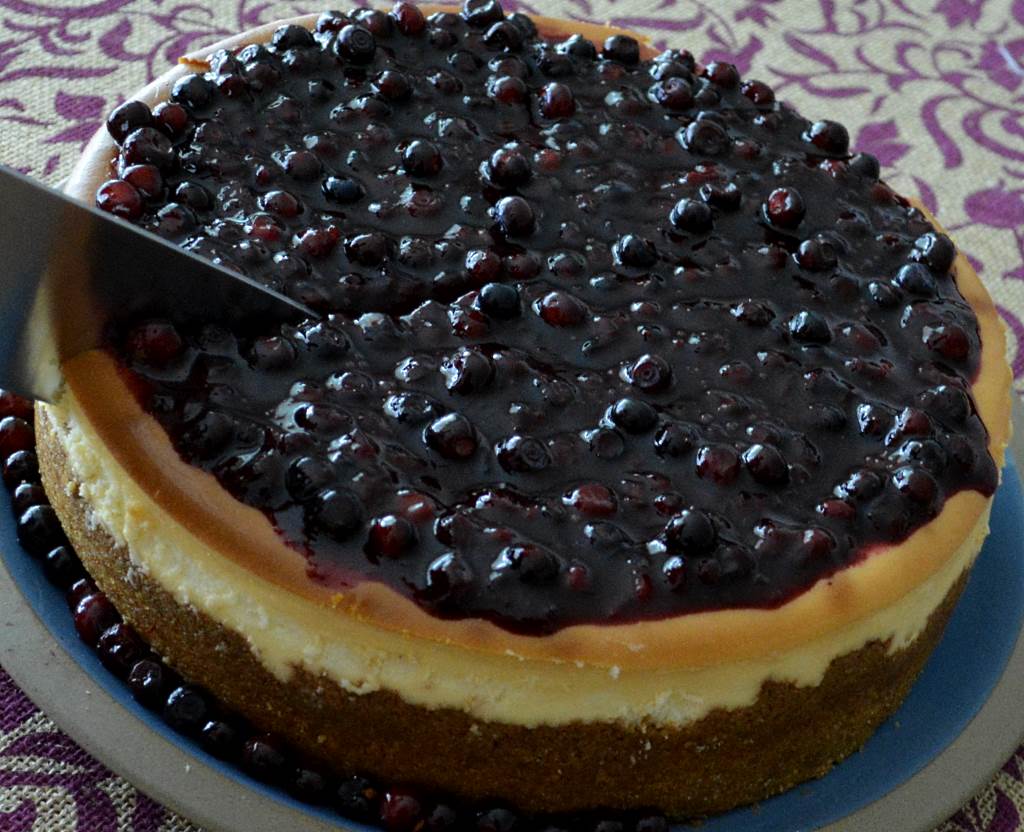 The first cut is the easiest. For every other cut you’ll want to wipe the knife off with a damp towel in between cuts. You don’t have to do that, but the slices will be prettier if you do.
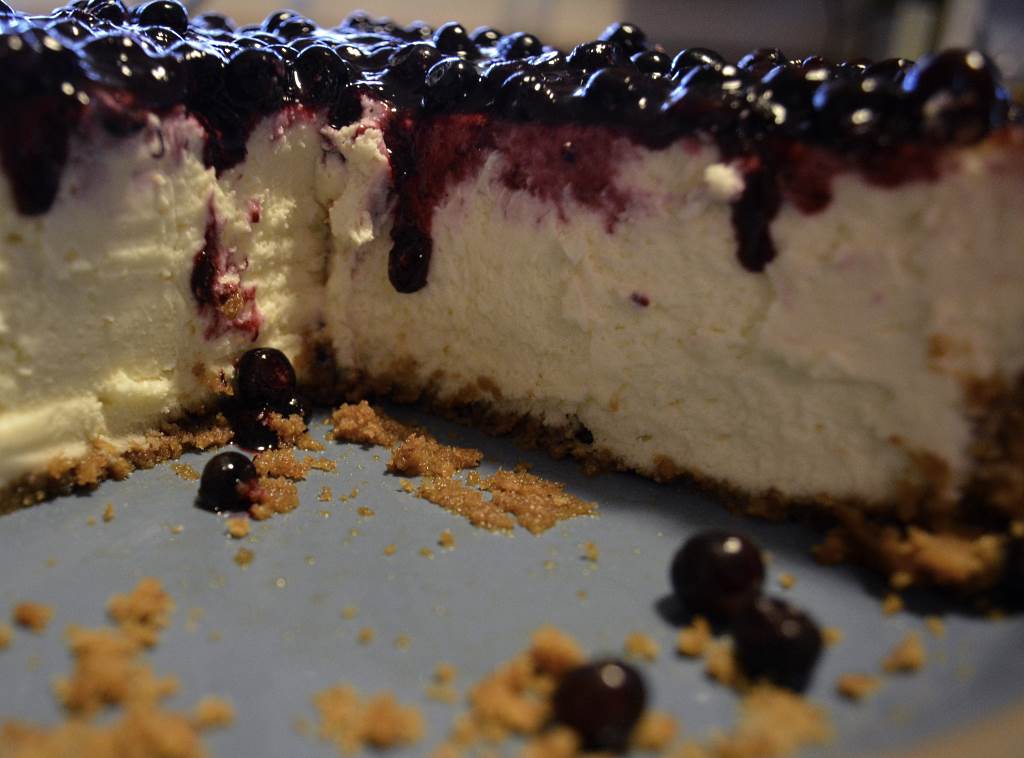
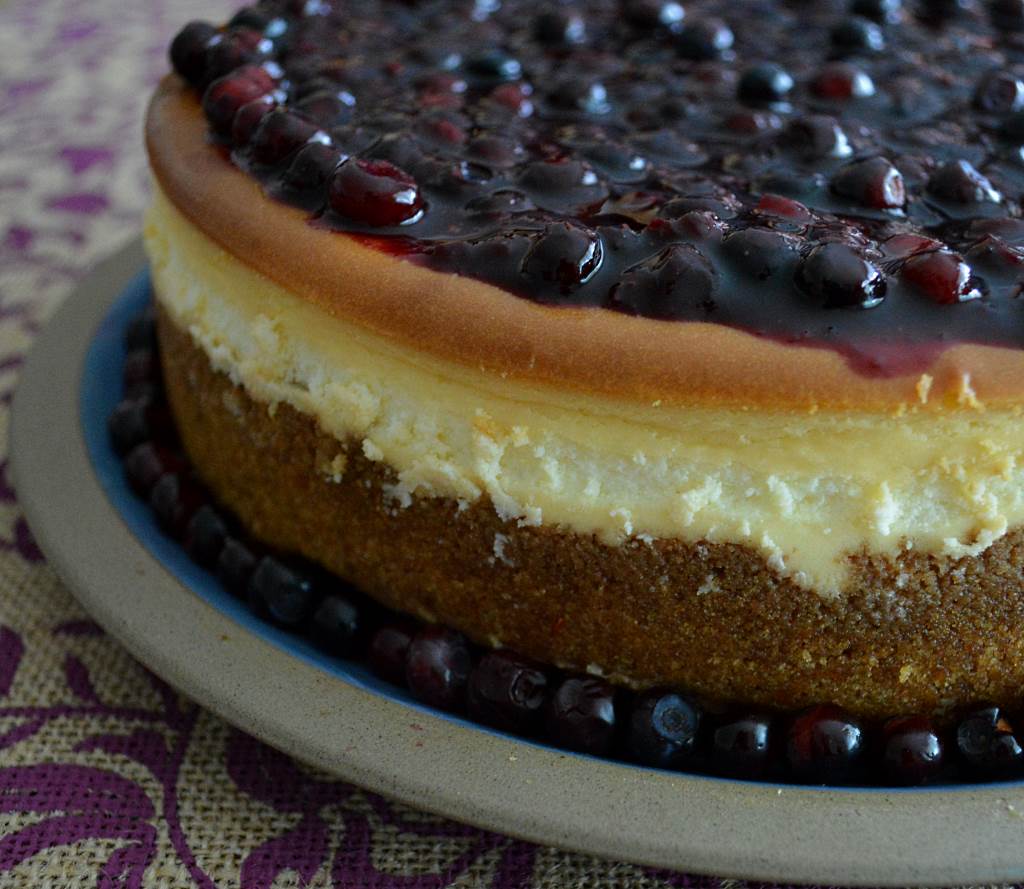
Sliced at cool room temperature. A bit more ragged than if I’d cut it straight out of the refrigerator. See below for a sleeker cut.
Ingredients
- 1 ¾ cups graham cracker crumbs (substitute gingersnap or chocolate wafer cookie crumbs if desired)
- 3 tablespoons sugar
- ¼ teaspoon cinnamon
- pinch of salt
- 2 oz. (4 tablespoons/ ½ stick) unsalted butter, melted
- 2 pounds cream cheese, at room temperature
- 1 1/3 cups sugar
- ½ teaspoon salt
- 2 teaspoons vanilla extract
- Zest of one lemon
- 4 large eggs, at room temperature
- 1 1/3 cups sour cream
- 1 cup (5 oz) huckleberries
- 2 tablespoons water
- 1 tablespoon lemon juice
- 3 tablespoons sugar
- pinch of salt
- 1/4 teaspoon cinnamon
- 2 teaspoons cornstarch
- 2 teaspoons water
Instructions
Butter a 9-by-3-inch cake pan with removable bottom (or a springform pan), and wrap the bottom of the pan in a double layer of aluminum foil.
Stir the crumbs, sugar, cinnamon, and salt together in a medium bowl. Pour over the melted butter and stir until all of the dry ingredients are uniformly moist. Turn the ingredients into the pan and use the flat bottom of a glass (or cup) to pat an even layer of crumbs on the bottom of the pan and about halfway up the sides. Don’t worry if the crumbs are not perfectly even around the sides. Put the pan in the freezer while you preheat the oven.
Center a rack in the oven. Preheat the oven to 350 degrees and place the cake pan on a baking sheet. Bake for 10 minutes. Set the crust aside to cool on a rack while you make the cheesecake batter.
Reduce the oven temperature to 325 degrees.
Put the huckleberries, water, lemon juice, sugar, salt, and cinnamon into a small saucepan. Bring the mixture to a simmer and cook until some of the berries begin to pop. In a small bowl mix together the cornstarch and water to make a slurry. Stir the slurry into the huckleberry mixture and cook until slightly thickened. Set aside to cool
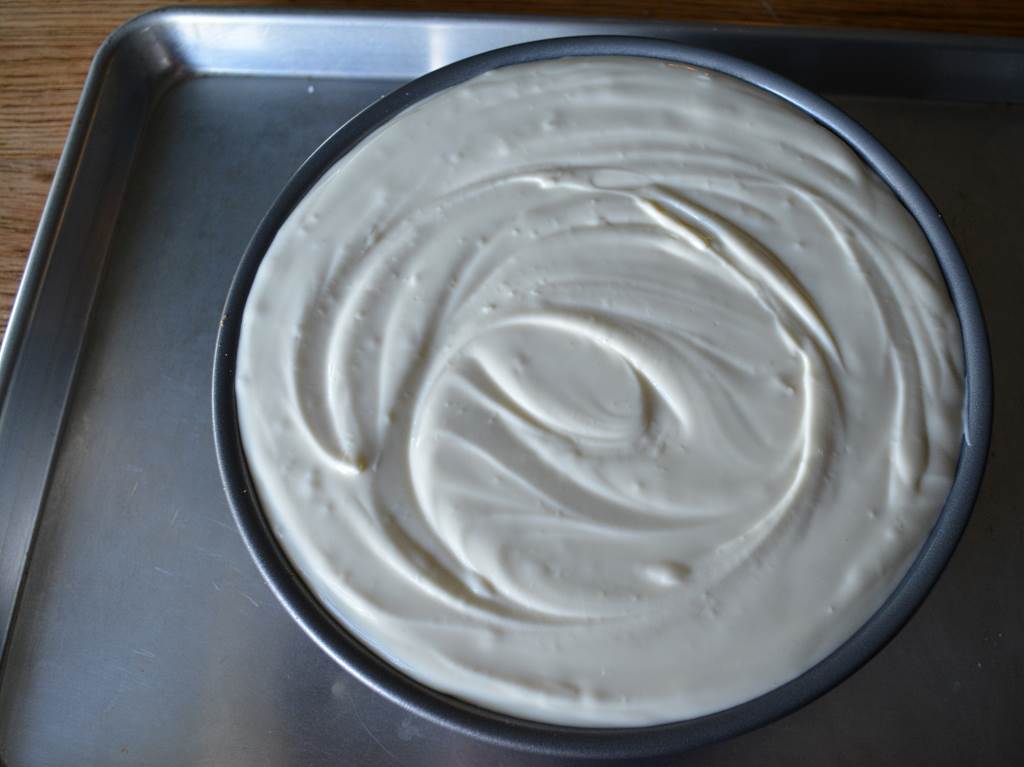
Working with a stand mixer, fitted with a paddle attachment, or with a hand mixer in a large bowl, beat the cream cheese at medium speed until soft and creamy, about 4 minutes. Scrape the bottom and sides of the mixing bowl, to make sure that there are no unmixed lumps. Add the sugar and salt and continue to beat for another 4 minutes or so, until the cream cheese is light. Beat in the vanilla. Scrape the bowl again. Add the eggs one by one, beating for a full minute after each addition—you want a well-aerated batter. Reduce the mixer speed to low and mix in the sour cream and/or cream. Scrape the sides and bottom of the bowl one last time.
Bring a kettle of water to the boil. Put the foil-wrapped cake pan in a roasting pan that is large enough to hold the pan with some space around it.
Scrape the batter into the pan. The batter will come all the way up to the rim of the pan. Put the roasting pan in the oven and pour enough boiling water into it to come halfway up the sides of the cake pan.
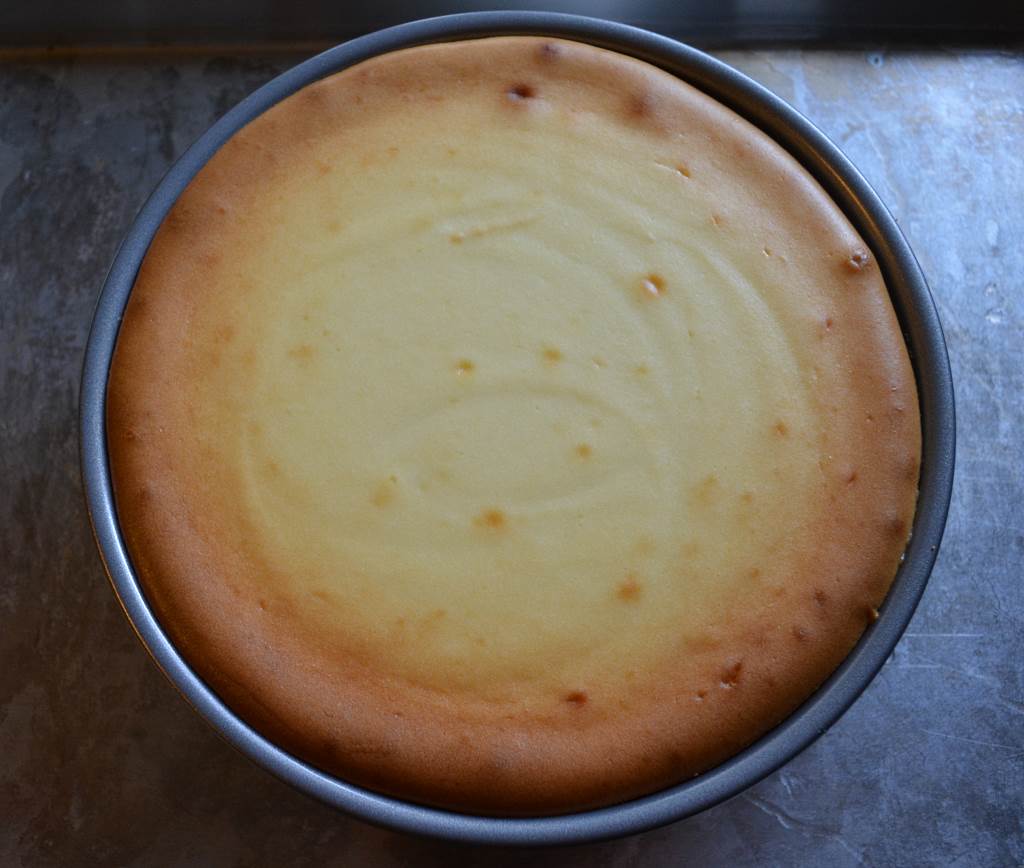
Bake the cheesecake for 1 hour and 30 minutes, at which point the top should be browned and may have risen just a little above the rim of the pan. Turn off the oven and prop the oven door open with a wooden spoon. Allow the cheesecake to cool in its water bath for another hour.
After 1 hour, carefully pull the setup out of the oven, lift the pan out of the roaster—be careful, there may be some hot water in the aluminum foil—and remove the foil. Let the cheesecake come to room temperature on a cooling rack.
When the cake is cool, cover the top lightly with plastic wrap and refrigerate for at least 8 hours; overnight is best.
At serving time, gently run a knife around the top edge of the pan--you don't have to reach all the way to the bottom.. If using a cake pan with removable bottom, set the pan on a large, sturdy can. Hold the top edge of the pan on opposite sides and push down steadily. If using a springform pan, use the same method, remembering to release the clip.
Spoon the huckleberry mixture on top of the cake, spreading it gently to the edges.
Notes:
Cooling and then chilling the cheesecake before slicing is very important—if the cake isn’t fully chilled it will not be firm enough to cut.
Chill time includes 1 hour in the turned off oven, an hour on the counter, and at least 8 hours in the refrigerator.
Beautiful, delicious and totally worth the wait! This cheesecake puts all others to shame. Its texture is impossibly light but also very substantial … doesn’t seem possible. The lemon zest is perfect with or without the huckleberries. Thank you for this!!
Thank you, Heidi, for your kind words–and the huckleberries!